
 153 Leytonstone Road, E15 1LH, London






A blunt chisel is a dangerous liability rather than a precision tool, yet many workshops struggle to maintain a consistent professional edge. This guide provides a clear methodology for sharpening a chisel to a surgically sharp, mirror-finish edge that holds its integrity through demanding joinery tasks.
Key Takeaways
- Understand why flattening the back of the blade is the most critical and often overlooked step in the sharpening process.
- Learn how to sharpen a chisel using a systematic grit progression that moves efficiently from coarse repair to a mirror-finish polish.
- Discover how implementing a 30-degree micro-bevel saves time and extends the life of the tool by reducing metal removal.
- Identify the optimal combination of honing guides and abrasives to ensure repeatable, professional results every time.
- Establish a maintenance routine involving rust prevention and proper storage to protect an investment in high-quality hand tools.
Table of Contents
- Why Sharpness Matters: Understanding Chisel Geometry and Bluntness
- Essential Sharpening Equipment: Choosing Your Stones and Jigs
- The Professional Sharpening Process: Step-by-Step Execution
- Achieving a Mirror Finish: Honing, Micro-Bevels, and Stropping
- Long-Term Maintenance and Restocking Your Workshop Supplies
Why Sharpness Matters: Understanding Chisel Geometry and Bluntness
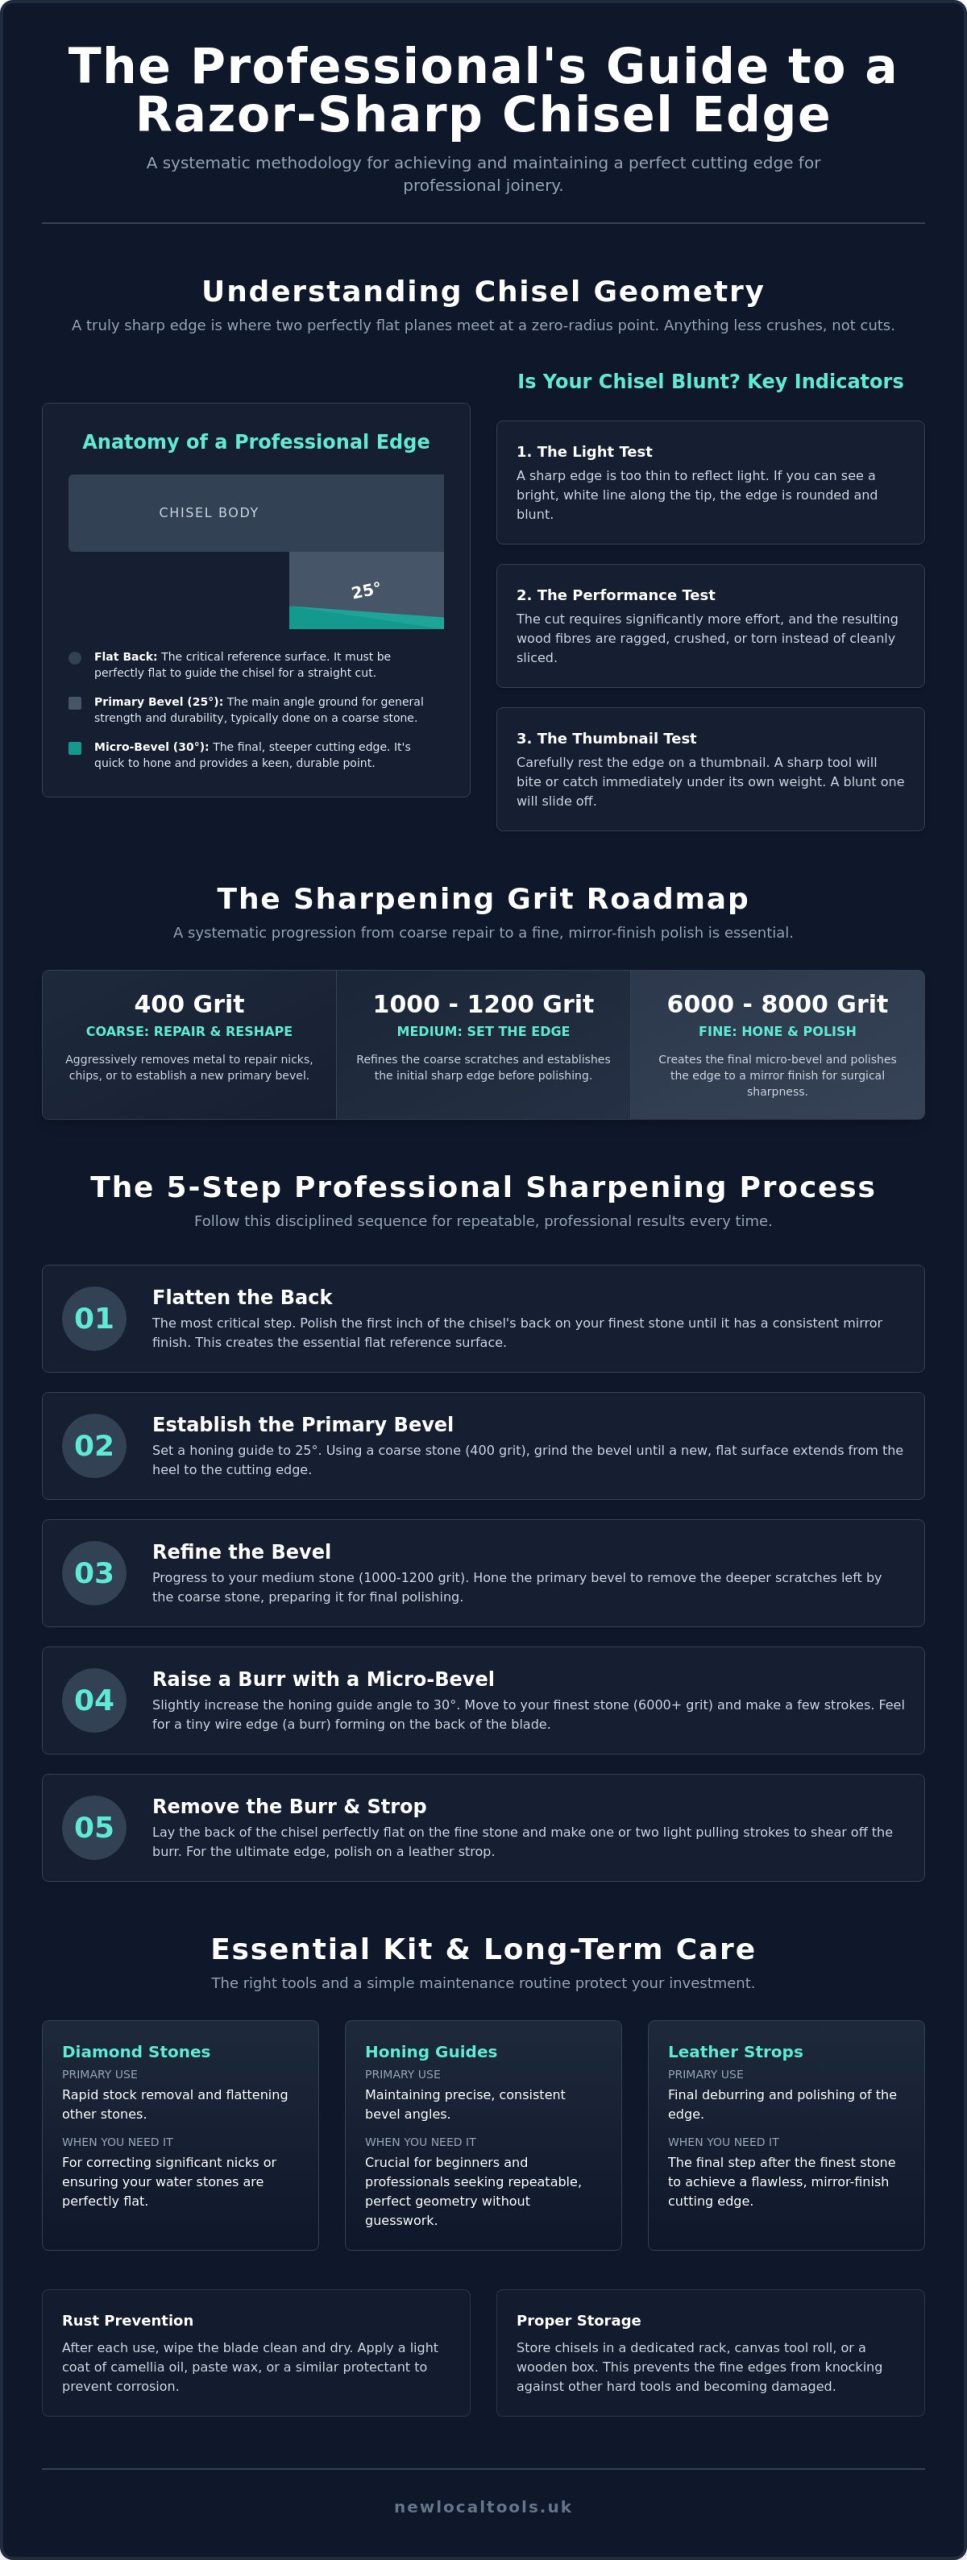
A chisel is a wedge designed to sever wood fibres with precision. A truly sharp edge exists only where two perfectly flat planes meet at a zero-radius point. When these planes become rounded or damaged, the tool no longer cuts — it crushes. For most professional joinery, a primary bevel is ground at 25 degrees, whilst the actual cutting is performed by a secondary honing angle of 30 degrees. This configuration provides the ideal balance between a keen edge and the structural durability required for hardwoods.
Identifying a blunt tool before it ruins a workpiece is a vital trade skill. A sharp edge is so thin it cannot reflect light — if a bright white line is visible along the tip, the edge has rounded over. Other signs include increased effort during the cut and ragged, crushed wood fibres. The thumbnail test is straightforward: rest the edge on a nail, and a sharp tool catches immediately under its own weight whilst a blunt one slides.
The Anatomy of a Professional Wood Chisel
The flat back of the chisel is just as critical as the bevel itself. It acts as a reference surface, guiding the tool through the cut to ensure a straight path. If the back isn’t perfectly flat, the chisel will dive or lift, regardless of how sharp the bevel is. For those seeking a comprehensive overview of chisel types, it’s helpful to distinguish between bevel-edged chisels, which are nimble for cleaning out dovetails, and thicker firmer chisels designed for heavy-duty mortising. Selecting the correct hand tools from a reputable manufacturer ensures the steel can hold these precise angles under heavy impact.
Identifying Common Edge Failures
Edges fail in predictable ways. Nicks are physical gaps caused by striking hidden staples or grit in reclaimed timber. Rolling occurs when the steel is too soft or the honing angle is too shallow, causing the thin edge to fold over. Rounding is the most frequent failure when sharpening without a guide — the angle fluctuates during the stroke, creating a convex surface that prevents the edge from biting. Recognising these failures dictates whether the tool requires a quick hone or a complete regrind on a coarse stone.
Essential Sharpening Equipment: Choosing Your Stones and Jigs
Selecting the correct abrasive determines both the speed of the task and the longevity of the tool. Oil stones are traditional and wear slowly. Water stones offer rapid metal removal but require frequent flattening. Diamond stones are favoured on modern sites because they remain perfectly flat and provide aggressive cutting for heavy repair work.
The grit scale is the roadmap for sharpening. A coarse 400-grit stone repairs nicks or resets a primary bevel. Mid-range grits of 1000 to 1200 set the initial edge. Ultra-fine 6000 to 8000-grit stones produce the final mirror polish. A honing guide is the most reliable way to maintain precise angles without the rounding failures common in freehand attempts.
Summary Comparison of Sharpening Tools
| Tool | Primary Use | When You Need It |
|---|---|---|
| Diamond Stones | Rapid stock removal and flattening. | Correcting nicks or flattening water stones. |
| Honing Guides | Maintaining precise bevel angles. | Ensuring repeatable results for beginners. |
| Leather Strops | Final deburring and polishing. | Achieving a mirror-finish edge after stones. |
Lubrication and Stone Maintenance
Lubrication prevents “loading,” where metal particles (swarf) clog the abrasive surface and stop the cutting action. Water stones must be soaked or sprayed, whilst diamond stones require specific fluids to operate effectively. Lapping fluid is a non-corrosive lubricant that keeps diamond stones clean. Even the best stones require maintenance; water stones eventually hollow in the centre and must be flattened against a diamond plate or abrasive paper on glass to remain functional. Following a clear step-by-step chisel sharpening process ensures that equipment is preserved whilst achieving the best possible edge. Maintaining these tools is as important as knowing how to sharpen a chisel itself, as a dish-shaped stone will never produce a straight edge.
The Professional Sharpening Process: Step-by-Step Execution
Success depends on a disciplined sequence that prioritises geometry over speed. The process starts with the back of the tool, followed by systematic refinement of the bevel — ensuring the cutting edge is formed by two perfectly intersecting planes rather than a rounded surface.
- Flatten and polish the back of the chisel to create a true reference surface.
- Establish or repair the primary bevel at 25 degrees using a coarse stone.
- Progress through grit levels to remove scratches left by the previous stage.
- Continue honing until a burr is felt across the entire width of the blade back.
- Remove the burr by stroking the back flat on the finest stone available.
Flattening the Back for Precision
A chisel back must be dead flat. If the back is bowed or pitted, the tool will never track straight through timber. For larger chisels, the ruler trick involves placing a thin steel rule along one edge of the stone to lift the blade slightly, allowing only the leading edge of the back to be polished. Flattening is usually a one-time task for new tools but remains the foundation of all future sharpening work.
Using a Honing Guide for Consistency
A honing guide locks the blade at a specific projection, dictating the sharpening angle against the stone. Applying even pressure across the centre of the blade prevents cambering, where the corners become rounded. A guide ensures every stroke on the stone contributes to a perfect edge rather than fighting against previous mistakes.
Achieving a Mirror Finish: Honing, Micro-Bevels, and Stropping
Once the primary geometry is established, the focus shifts to the micro-bevel — honing only the very tip of the blade at a slightly steeper 30-degree angle. Instead of polishing the entire 25-degree bevel face, the tradesperson works a tiny fraction of the steel, achieving a razor edge in seconds. This refined tip is then finished on a leather strop to remove the final wire edge and achieve a flawless mirror finish.
The Science of the Micro-Bevel
A 30-degree edge provides essential structural integrity amongst dense hardwoods like oak or mahogany, preventing the thin cutting edge from rolling or fracturing under heavy mallet impact. A micro-bevel allows for five to ten refreshes before the primary bevel needs regrinding — keeping the tool in peak condition whilst minimising downtime on the job site.
Polishing Compounds and Stropping
Stropping uses a firm leather strip charged with green chromium oxide compound, typically featuring a particle size of 0.5 microns. The user must employ a pulling motion — pushing the blade forward causes the tip to bite into and ruin the leather surface. Drawing the blade back across the strop repeatedly aligns the steel at a molecular level, creating a surface that reflects light perfectly. A mirror finish is the ultimate indicator of a professional edge that will glide through timber with zero resistance.
Wood Chisels at New Local Tools
New Local Tools stocks a range of professional wood chisels from trusted brands — for precision joinery, heavy-duty mortising, and everything between.
For individual chisels: the DeWalt DHT016065 25mm Side Strike Chisel is a reliable bench size for everyday joinery work.
For sets: the Milwaukee 4932479897 6-24mm Bevel Edged Chisel Set — 4 Piece covers the most common sizes in one purchase. The Stanley STA016129 6-25mm 5002 Bevel Edge Chisel Set — 4 Piece is a solid all-round option. The Irwin MAR373S6 Splitproof Bevel Edge Wood Chisel Set — 6pc offers a full range of sizes with impact-resistant handles for mallet work. For professional-grade precision, the Irwin Marples MS500 Splitproof Chisel Set — Pack of 4 is a benchmark choice among UK joiners. The Bahco BAH434S3 434 Bevel Edge Chisel Set — 3 Piece brings Scandinavian steel quality to the bench.
Browse all wood chisels at New Local Tools →
Long-Term Maintenance and Restocking Your Workshop Supplies
Sharpening frequency depends on timber density. Hardwoods like oak or mahogany dull an edge faster than softwoods like pine. A professional doesn’t wait for the tool to fail completely — quick touch-up hones on a fine stone at the first sign of resistance keep the edge productive. Inspect handles and ferrules regularly; a split handle or loose ferrule should be removed from service until repaired.
Sharpening Consumables Restock Table
| Item | Use | Notes |
|---|---|---|
| Honing Oil / Lapping Fluid | Lubricating diamond and oil stones. | Prevents swarf from clogging the abrasive surface. |
| Polishing Compound | Charging leather strops. | Green chromium oxide is the trade standard for a mirror finish. |
| Replacement Abrasive Sheets | Flattening water stones on glass. | Essential for maintaining a dead-flat reference surface. |
Efficient workshops stay ahead of their needs by keeping these items in stock. Tradespeople can check the latest deals to ensure they have the necessary supplies without overpaying.
Storing and Organising Your Hand Tools
Leaving chisels loose in a toolbox allows tips to strike other tools, causing nicks. Protective plastic caps are a simple solution. For mobile tradespeople, a heavy-duty tool roll provides individual pockets. In a permanent workshop, magnetic or slotted racks keep tools organised and visible. A dedicated sharpening station encourages consistent maintenance habits and professional standards.
Mastering the Professional Edge in Your Workshop
A razor-sharp chisel is the foundation of high-quality joinery. By mastering the routine of flattening, honing, and stropping, tradespeople ensure their tools perform with surgical precision. The transition from a 25-degree primary bevel to a 30-degree micro-bevel provides the durability needed for demanding hardwoods whilst reducing time spent on the stones. Consistent maintenance and proper storage protect essential hand tools from environmental damage.
New Local Tools stocks professional wood chisels from Stanley, Irwin, Bahco, Milwaukee, and DeWalt with free delivery on UK orders over £100.
Browse all wood chisels at New Local Tools →
Frequently Asked Questions
Can a bench grinder be used to sharpen chisels?
A bench grinder is suitable for resetting a primary bevel or repairing significant damage rather than final sharpening. High-speed grinding generates friction heat that can draw the temper from the steel, rendering it soft and unusable. Tradespeople should use a white aluminium oxide wheel and frequent water quenching to prevent overheating during the initial grind. Final edge refinement must always be completed on stones to achieve the necessary precision.
How often is sharpening required during a woodworking project?
Why does a chisel edge chip during heavy use?
Edge chipping often occurs because the honing angle is too shallow for the timber being worked. If the micro-bevel is ground below 30 degrees, the steel may lack the structural support needed for hardwoods or heavy mallet impacts. Increasing the angle slightly provides more durability at the tip. Additionally, checking for hidden metal fasteners or grit in reclaimed timber prevents sudden and avoidable edge failure.
Is it better to sharpen freehand or use a honing guide?
Using a honing guide is the most reliable method for maintaining a consistent and repeatable angle. Whilst some experienced professionals develop the muscle memory for freehand work, a guide removes the risk of rounding the bevel through human error. It ensures every stroke contributes to a perfect edge, making the process of how to sharpen a chisel more predictable and efficient for tradespeople on the job site.




 153 Leytonstone Road, E15 1LH
 Log into your account


